The Invites Tab
The invites tab is where you can send messages to your attendees or to people that you want to attend you event.
1) Invitations
You can use our beautiful email template to create a professional, customized invitation and send it out to everybody on your email list.
To get started, click on 'Create Invitation'.
The page will reload to an area where you can customize, preview and then send your email invitation. Let's take a look at the top section:

Here, you can customize what your invitees will see when the email shows in their inbox. By default, the Name of Sender field will have your organization name and the Subject Line Field will say 'You're invited to EVENT NAME (DATE OF EVENT)'. To change the contents of these fields, simply click in the field and edit away. Let's snazz this one up as an example:

I added my name to make the email a little more personal and stripped out the date and added to punctuation to shorten the subject line and make it more catchy. It's just a small example of what you could potentially do here. Now let's take a look at the template.
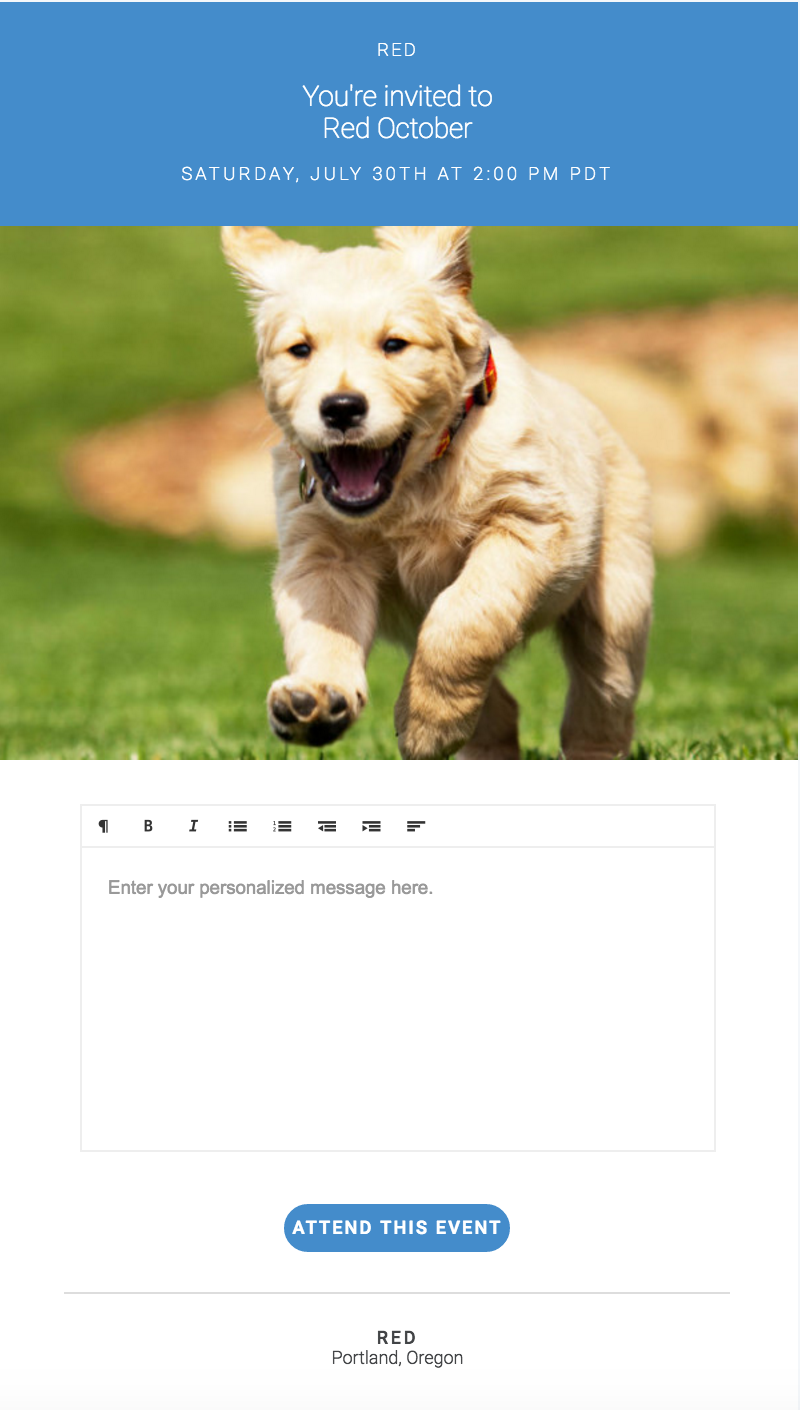
Pretty cool right? You're invite automatically uses your event image and provides important information such as the Date and time of the event. In the text edit box under the event image you can add custom messaging to your attendees. Like what you see? Then maybe you are ready to add invitees and send off the invitation. Still have questions? If so, you can send yourself a test invite to see what this thing will look like in the wild.

When you click send, you should see a success message pop up saying 'Test Invitation Sent'. Head to your inbox and check it out, we think you will like the way it looks!
Now we are ready to start adding invitees to our list as we prepare to send this thing off. First click 'Add Guest' in the Invite Your Guests section. The button is located on the right side of the section.

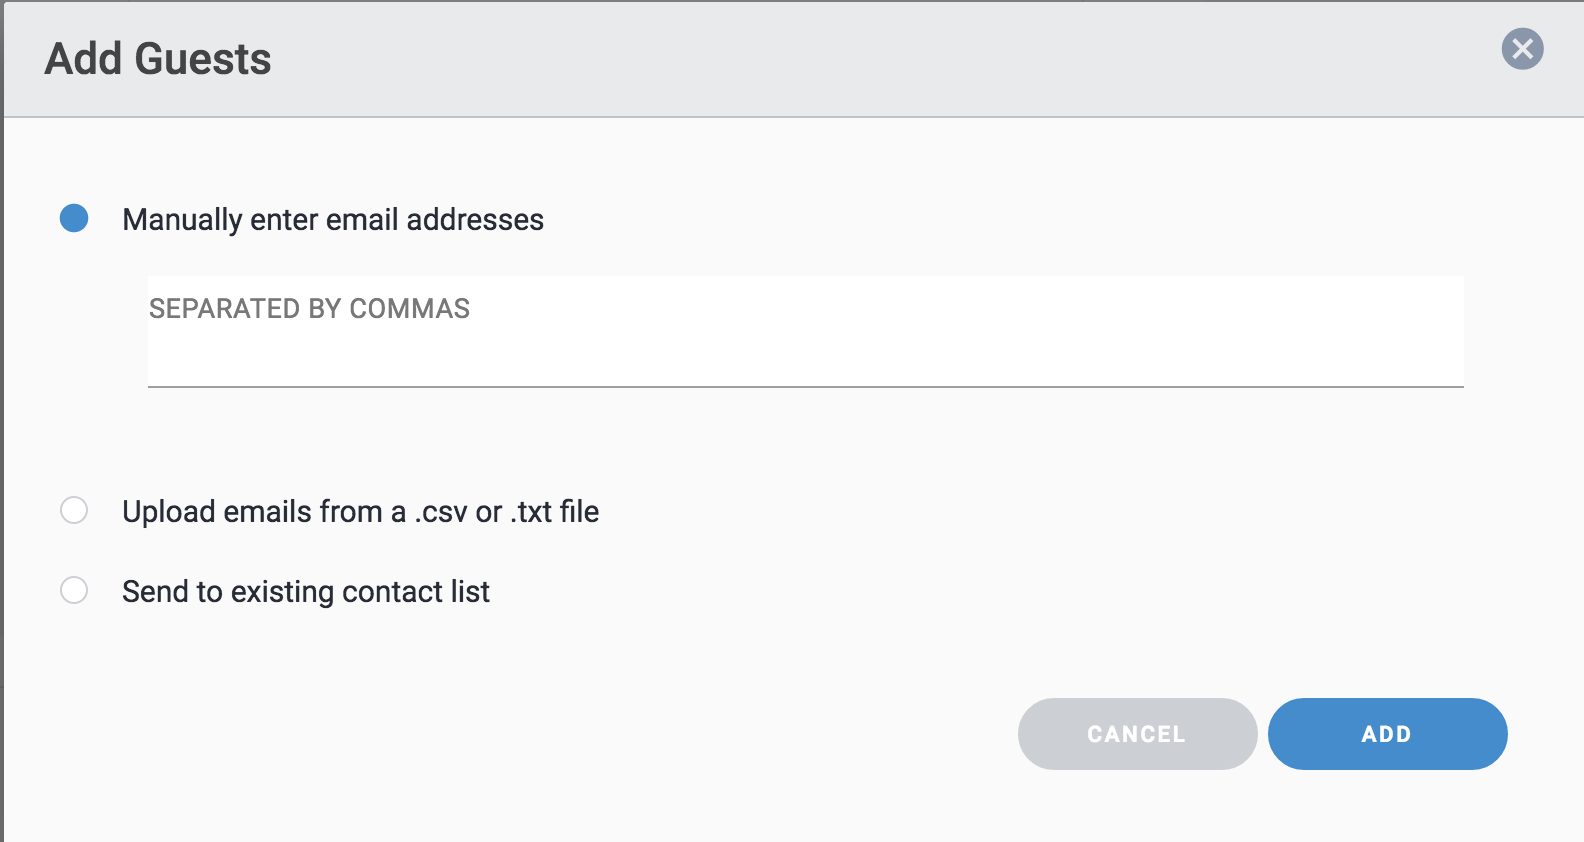
You will see a popup with three options for adding people to your invite list.
Let's walk through the different choices:
Manually enter email addresses: Here, you can enter in email addresses one by one. Use a comma to separate each email address. This is ideal if you only want to send invites to a few people. Please note that if you use this option, that the email template will not know the invitees first name so it will say "Hi," instead of "Hi, Derrick,".
Upload emails from a .csv or .txt file: This is the best way to upload large lists to our system. The most important thing here is formatting. Make sure if you are working in Excel or Google Sheets that you save the file as a .csv and that you have the following rows: "email", "first name", and "last name" as the first three columns.
Send to existing contact list: ImpactFlow creates lists whenever you send out an invitation like this. Here, you can choose from a drop down of previous lists. This is the most helpful when you want to send invites to a list you have already used, probably for a different event.
Please note, if you are loading a large list, please give our system some time to process all of the information. You will see a spinning green circle that indicates the ImpactFlow system is uploading your list.
When it loads, you will see a list with ten of the names on your list and a drop down that will let you take a look at other parts of the list. When you are ready to send the invitation you can hit send now. You can also save the work you have done for later, or cancel the invitation all together. You can see how well these invitation emails are performing by going to The Analytics Tab and looking at the Email Report.

2) Email Attendees
You can use our beautiful email template to create a professional, customized message and send it out to your attendees in a few different ways.
To get started, click on 'Send Announcement'.
the screen will change and you will see this:
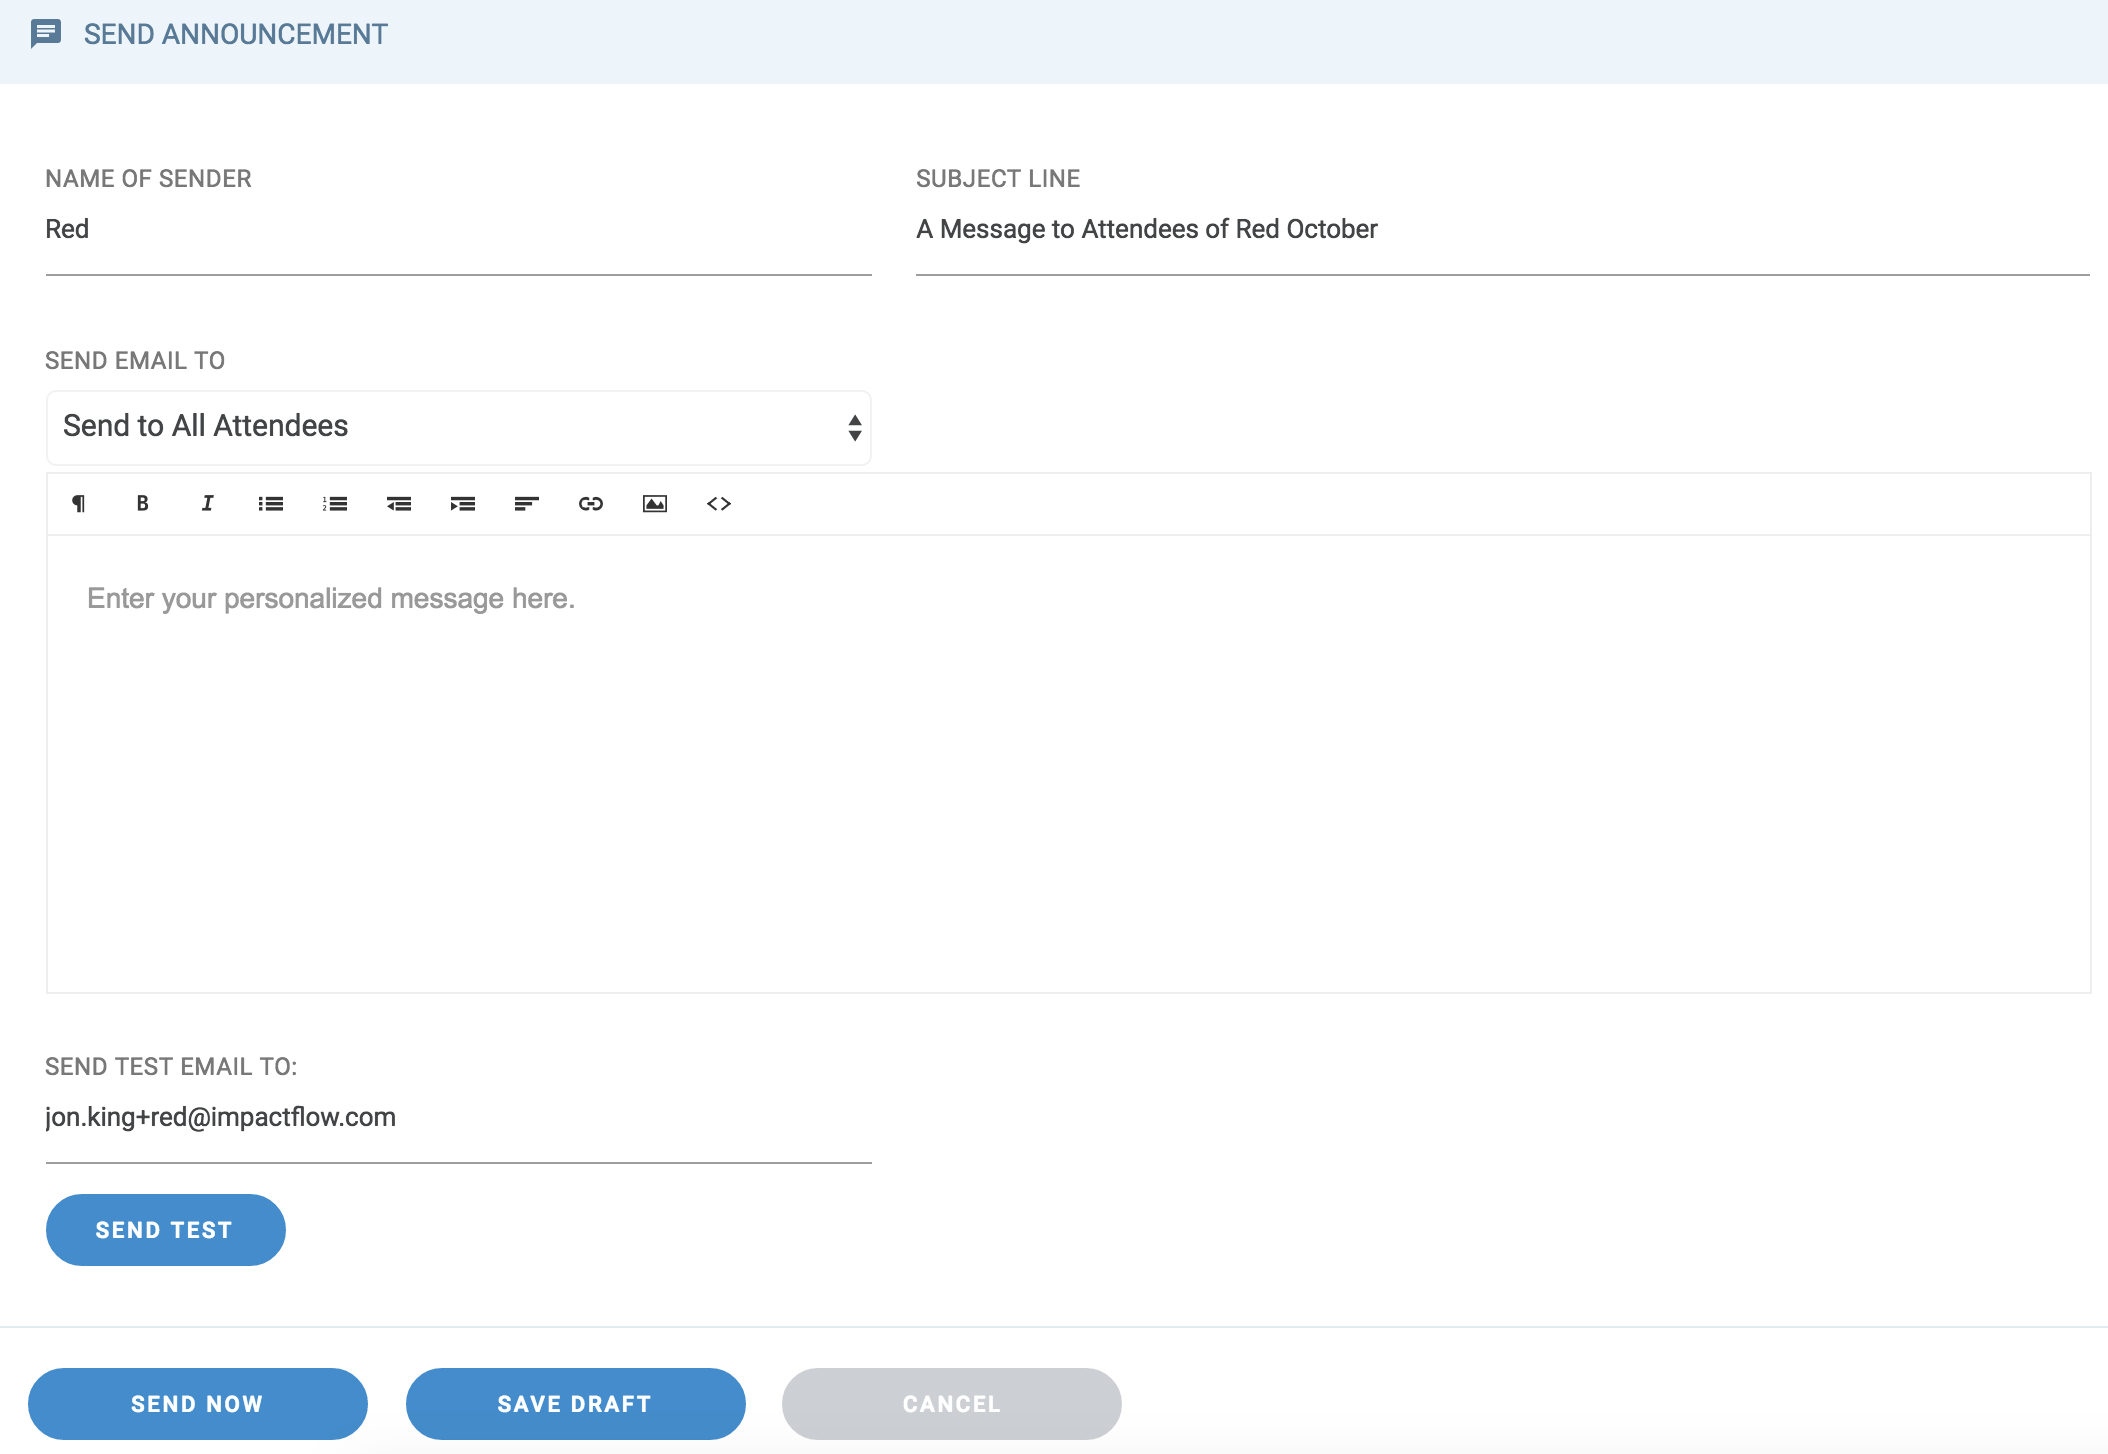
Just like with invites, you can customize what your attendees will see when the email shows in their inbox. By default, the Name of Sender field will have your organization name and the Subject Line Field will say 'A Message to Attendees of EVENT NAME'. To change the contents of these fields, simply click in the field and edit away. Again, here is an example of customizing these fields:
I added my name to make the email a little more personal and stripped out the default subject line so I could communicate the importance of the message. Now, we get to choose which attendees we would like to send the message to:
In this drop down, there are three options as follows:
Send to All Attendees: When this option is selected, your message will be sent to all of the people who have placed an order for your event.
Send to Attendees by Ticket Type: When this option is selected, your message will be sent to all of the people who have ordered a specific ticket type for your event. When you select this option, a second field will appear, where you will select the ticket type.
Send to Attendees Registered After: When this option is selected, your message will be send to only people who have placed orders for your event after a date of your choosing. hen you select this option, a second field will appear, where you will select the date.
Now it is time to construct your message. We have provided a full-featured text editor so you can include images, lists, links and more.
Once you are done with your message, you are ready to send off the invitation. Still have questions? If so, you can send yourself a test invite to see what this thing will look like in the wild.

If you like what you see with the test email, you can go ahead and click 'Send Now' with confidence.


